Yesterday we had our vet come out to the homestead to take a look at Brown Cow. Nothing was wrong but Rosie wanted to have her checked out to see how Cow is doing with her pregnancy.
For some reason Cow is in utter dread of the Vet, but she has only seen him twice now. Normally Cow is very docile, we bring her food and she just stands there while we milk her, check her for wounds and do a few other "cow maintenance" things. We never have problems with cow running way, shying from the milker, or any of the other problems we hear other cow owners have with their animals. We consider ourselves very lucky to have such a well behaved cow. But when the vet walks onto the property Cow flips out, a lot. When she sees the vet she starts to become very alarmed, to the point of running and kicking and jumping. And when you have a 850 lb cow trying to jump away from you and kick everything in site, you are going to have a bad day. I really don't understand where her dislike comes from, the Vet is a nice man and has always been gentile to Cow (He has only seen her twice!)but she has it in her head that he is some sort of Cow torturing monster. The First time the Vet came out Cow actually hurt herself while trying to get away from him, the second time I knew better and had her stoutly secured before he came outside.
In any case Cow is about 5 months pregnant (9-10 months gestation) and seems to be in very good health. So all is well. It looks like we can be expecting a calf sometime in the Spring. If the calf is a female we will most likely try and sell her, if the calf is a male we will see about fattening him for a year and then give him a "retirement party".
In case anyone in our neck of the woods needs a farm animal Vet we would recommend "The Large Animal Practice" based in Los Osos. A good Vet who is very reasonable priced, and does not mind dealing with the occasional neurotic cow.
Saturday, December 29, 2012
Tuesday, December 25, 2012
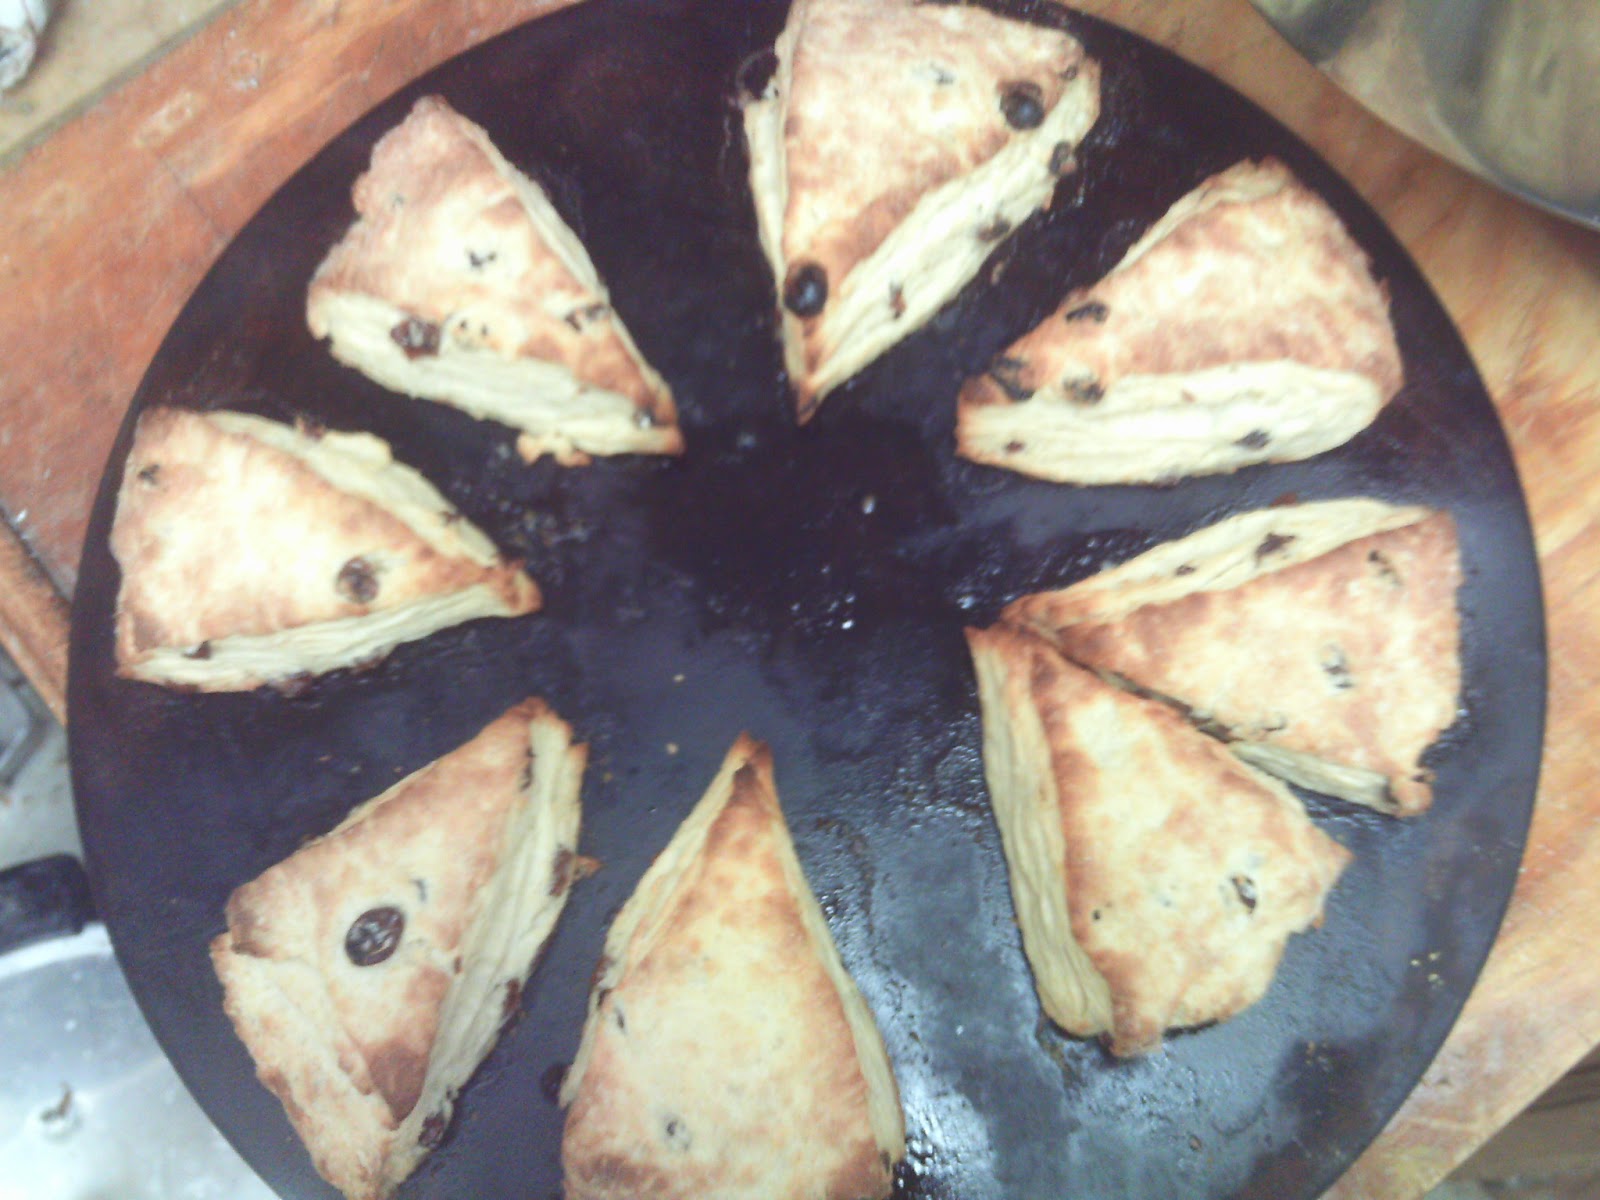
Shortbread
I am a fan of stoneware. I use it all the time for baking and all my stoneware is black from use. With this in mind Jed and Ivan got me a shortbread stone pan for Christmas. I Squeed.
Here is the image of the pan shortly after curing.

It takes a half of a recipe so I'll include the honey version we tried out today.
Shortbread recipe:
1/2 cup butter at room temperature
1/4 cup honey (you can do a little less if you don't want it too sweet)
1 tsp vanilla
1 cup flour sifted
Preheat oven to 325 degrees F. In a large bowl mix your honey into the softened butter. Once completely incorporated add the vanilla and mix well. Once it is all mixed then start sifting flour into the butter mixture a half cup at a time. Mix well. Once it is done press firmly into your shortbread pan or roll out on a floured surface and use cookie cutters or molds.
 Using a fork stab the shortbread. Bake for 35 minutes or until slightly golden. Once the shortbread is done remove your pan from the oven and let the shortbread rest in the mold/pan for 10 minutes. Flip your shortbread onto a surface you can cut on and cut our your shortbread while still warm. Let cool to get the maximum crumble. Enjoy!

Here is the image of the pan shortly after curing.

It takes a half of a recipe so I'll include the honey version we tried out today.
Shortbread recipe:
1/2 cup butter at room temperature
1/4 cup honey (you can do a little less if you don't want it too sweet)
1 tsp vanilla
1 cup flour sifted
Preheat oven to 325 degrees F. In a large bowl mix your honey into the softened butter. Once completely incorporated add the vanilla and mix well. Once it is all mixed then start sifting flour into the butter mixture a half cup at a time. Mix well. Once it is done press firmly into your shortbread pan or roll out on a floured surface and use cookie cutters or molds.


Friday, December 21, 2012
Recipes from the farm: Lentil Soup
To go along with Rosie's cooking at work posts I wanted to start posting about the food we eat on a regular basis here on the homestead. The "Recipes from the farm" will be food that we and our helpers eat here on a normal day; nothing too fancy or off beat, just the normal meals we make from what we produce and serve at our table.
Tonight's post will be Lentil Soup, a "lazy food" we just throw in a pot to feed a lot of people without much work.
1-3 lbs of pork (ham/belly/shank/bacon/stew meat, whatever you have)
3 carrots
1-2 onions
3+ cloves of garlic
8 or so cups of water
2 cups of lentils
2-4 potatoes
some balsamic vinegar
salt and pepper
Olive oil or lard
Start by lightly brown the pork in the bottom of a cast iron pot (or other heavy bottomed pot) with some oil/lard. Once the meat it lightly browned, add the onion, garlic and carrot and cook over high heat for about 5 min. Pour in the water then add the lentils and potatoes (if you have some extra sausage from breakfast you can add that as well). Let it simmer for about 45 min then add salt and pepper to taste. Just before serving pour about 3 tablespoons of balsamic vinegar into the pot and stir. Then ladle into bowls and serve with some fresh bread (Holly frequently provides fresh bread for dinner on our "crafting" nights).
This is the kind of soup that you can add whatever you have on hand to and it will probably work out pretty well. Also we will adjust the amounts of everything depending on what we have on hand, some times no potatoes on ready so we skip them or maybe substitute turnips, maybe add some celery or some bell pepper, really you can add or remove just about any anything.
Thursday, December 20, 2012
Frost!
Here are some images from my mornings. All I can say about my evenings is that if I'm not careful to place fabric between my hand and the metal handle of the wagon then my hand freezes to it. I'm glad none of the animals are showing any sign of frost bite and that they all seem to do well in the cold.


 The top image is of a frozen puddle in the back yard, followed by an image of ZooZoo's back covered in frost, then an image of a rooster with frost on his back, and lastly what the windshield looked like after 10 minutes with the defroster on full blast.


The Lunch Hour - Elephant Ears
Today I debated making some main dishes in the toaster oven rather than just baked goods, but then I saw a recipe for elephant ears and decided to try that instead. (On a side note, I still plan on making some red enchilladas and maybe some rigatone in the toaster oven at work; they are both simple, fast recipes that can cook within the time limit of an hour including prep time.)
The recipe I saw was in a holiday book and it called for puff pastry so I decided to make my own. I'll include the recipe using puffed pastry for those who would like to take that route as well.
Book recipe (what I recall): Thaw out puffed pastry. Lay out in sheets. Sprinkle sheets with sugar and some butter. Roll up opposite sides so that they meet in the middle. Cut out into pieces. Place on sheet and bake at 375 for 15 minutes. Let cool and then dip them in chocolate.
As some of you may recall, I don't do well with sugar or things containing sugar so I decided to make a Rosie version instead so that I would be able to eat the pastries as well.
Rosie version:
1 stick of cold butter (1/2 cup) cut into flakes
2 cups of flour
a pinch of baking powder
Some milk
Honey
Cinnamon
Pre-heat toaster oven to 350 degrees F. In a large bowl, cut butter into the flour with a pastry cutter or two knives. Once it is all crumbly add a bit of cold milk to the flour and mix with a fork. Add milk until your crumbles are about the size of small marbles. Making sure that your hands aren't too warm, use the palm of your hand or your knuckles to press the dough down. Once it is all one mass, fold the mass in half keeping the side with unincorporated flour on the inside. Knuckle that down again and then fold using the same process. You will do this until all of the flour is incorporated, taking care to not let the dough get too warm of else you'll end up with a rock hard dough that crumbles.
Cut your dough in half and place the half you are not immediately using in the fridge until you are ready to use it. On a lightly floured surface roll out dough so that you end up with one side longer than the other, roughly the size of a sheet of paper. Drizzle honey onto your dough and then sprinkle with cinnamon. My suggestion for the quantity of honey is enough so that when you roll the sides it will all contain some and enough cinnamon to lightly dust the entire surface. Roll up the long sides until they meet at the center. Cut the rolled dough into 1/4 inch thick rolls. (I left a few pieces thicker and it turned into a flaky cinnamon roll.) Place on cookie sheet and bake for 10-15 minutes or until they are fluffy and slightly brown.
Once they are done let them cool and they will acquire an extra crunchiness that is associated with this treat. Enjoy!
 I had extra dough left over from today's treats so I brought home to make for dessert. The pot in the background also has candied milk. =)
The recipe I saw was in a holiday book and it called for puff pastry so I decided to make my own. I'll include the recipe using puffed pastry for those who would like to take that route as well.
Book recipe (what I recall): Thaw out puffed pastry. Lay out in sheets. Sprinkle sheets with sugar and some butter. Roll up opposite sides so that they meet in the middle. Cut out into pieces. Place on sheet and bake at 375 for 15 minutes. Let cool and then dip them in chocolate.
As some of you may recall, I don't do well with sugar or things containing sugar so I decided to make a Rosie version instead so that I would be able to eat the pastries as well.
Rosie version:
1 stick of cold butter (1/2 cup) cut into flakes
2 cups of flour
a pinch of baking powder
Some milk
Honey
Cinnamon
Pre-heat toaster oven to 350 degrees F. In a large bowl, cut butter into the flour with a pastry cutter or two knives. Once it is all crumbly add a bit of cold milk to the flour and mix with a fork. Add milk until your crumbles are about the size of small marbles. Making sure that your hands aren't too warm, use the palm of your hand or your knuckles to press the dough down. Once it is all one mass, fold the mass in half keeping the side with unincorporated flour on the inside. Knuckle that down again and then fold using the same process. You will do this until all of the flour is incorporated, taking care to not let the dough get too warm of else you'll end up with a rock hard dough that crumbles.
Cut your dough in half and place the half you are not immediately using in the fridge until you are ready to use it. On a lightly floured surface roll out dough so that you end up with one side longer than the other, roughly the size of a sheet of paper. Drizzle honey onto your dough and then sprinkle with cinnamon. My suggestion for the quantity of honey is enough so that when you roll the sides it will all contain some and enough cinnamon to lightly dust the entire surface. Roll up the long sides until they meet at the center. Cut the rolled dough into 1/4 inch thick rolls. (I left a few pieces thicker and it turned into a flaky cinnamon roll.) Place on cookie sheet and bake for 10-15 minutes or until they are fluffy and slightly brown.
Once they are done let them cool and they will acquire an extra crunchiness that is associated with this treat. Enjoy!

Wednesday, December 19, 2012
The Lunch Hour: Apple Crisp
This is one of those treats that you can do during your break and have the smell fill up the whole office. Our little toaster oven has a pan so I just fill up the pan.
Preheat toaster oven to 350 degrees F
Ingredients:


Preheat toaster oven to 350 degrees F
Ingredients:
4-5 apples peeled, cored, and sliced somewhat thinly
1/2 cup honey
dash of ginger, cinnamon, nutmeg
For the crisp part on top:
1/4 cup honey
1/2 cup cold butter sliced thinly
1 1/2 cup of flour for a crumbly crumble
To modify it to your baking needs:
Place apples in your dish, sprinkle with spices, and cover with enough honey that you can see a little bit of honey at the bottom. Make sure honey covers all slices by moving pieces around with a fork. Make sure that your apples fill about 3/4 of your pan so that there is enough space for your crisp part on top.

For the crisp part on top, place the honey on the thinly sliced cold butter, and cover both with flour. Using a pastry cutter, cut the butter into the flour. Make sure the crumble part is actually crumbly. If needed add more flour to give it that desired texture. Once crumbly place on top of your apples in your dish. Make sure all apples are covered.

Put into toaster oven for about 20-25 minutes. Check on it every once in a while. Our toaster in the office has a tendency to slightly burn the center part of the crisp. It will be done when some of the apple/honey juices are bubbling on the sides of the crisp.

One of these days I'll actually bring a camera to take pictures of the items I bake at work.
Once done bring out and let cool. You'll have a long line of people waiting to eat the cobbler/crisp, just remind them to bring their own plates.
Sunday, December 16, 2012
Soap Recipes - Basic
I couldn't find my recipes the other day and I told myself that it would be nice if I had them on the blog to refer to in the future or if I lost my papers with my recipes and experiment notes.
Basic Soap Recipe
Equipment you'll need:
Non reactive bowls such as plastic or stainless steel (any metal will get hot so be careful)
Scale to weigh out ingredients
Whisk (or electric hand blender)
Mold
Instant Read Thermometer
These fats are either lard, tallow, or olive oil. If using other oils please refer to a soap calculator to determine the water/lye quantity that you will need.
16 oz fat
2 oz lye (sodium hydroxide)
5 oz water
Most recipes I've found also include coconut oil, palm oil, and other oils or scents... None of that is necessary. A good soap can be made with really simple ingredients. If you wish to spice it up you can infuse your oils with herbs to get some of the smells and natural oils present in the soap, especially if you super fatten your soap (add up to an additional 5% fat to smoothen the soap and the add the qualities of the plant oils to your soap).

Steps for cold process soap:
1) Heat oil to about 130 degrees F.
2) Using gloves and goggles, pour the lye into the water (make sure that you are in a well ventilated area and the the water container can withstand high heat and does not interact with the material of the container. Do not use aluminum, use plastic if possible as your glass containers will break with the heat and then you'll have lye water all over your floor... with shards of glass.) Leave until it reaches 130 degrees F.
3) Pour lye solution into the fats and stir.
4) Sponification is happening. Stir until you can lift your whisk and it leaves a trail (trace).
5) Pour into mold.
6) Leave for 24-48 hours.
7) Cut bars or pop from mold.
8) Place somewhere dark and well ventilated.
9) Let cure for 4-8 weeks (or more)
10) Use your awesome soap.
Note: If you use a hand blender your stirring/whisking time will be cut down to seconds instead of whisking for hours.
Tuesday, December 11, 2012
The Lunch Hour - Grilled Cheese Sandwiches
There is nothing easier to make in a toaster oven than grilled cheese sandwiches. I was spoiled today as I was able to use Farmer Bill sourdough bread and some home cheese. The result was an awesome grilled cheese sandwich that I ate with home canned tomato soup. Just the perfect thing to eat for a fast lunch with minimal prep and cook time.
I've also tried to change things up a bit. Wheat with Dubliner, or rye with a Manchego, both were delicious but I'll keep trying different combinations to see what works best and what gives me that perfect goey deliciousness that offsets the sweetness of the tomato soup. If you have any good combinations please let me know so that I can try it out at work.
And for the feeling of a recipe:
Ingredients:
A few slices of bread
A few slices of cheese
Place the cheese between the slices of bread. Toast in the toaster oven for five minutes on Toast or until the bread is slightly toasted and the cheese has melted. Ta-da!
Monday, December 10, 2012
The Lunch Hour - Coconut chocolates
I've recently acquired a job, which you can probably surmise from the lack of posts. One thing I discovered is that you can bake almost anything in one of those little toaster ovens. Not to mention all the things you can do with an hour of your time and the right ingredients. And as such I'm starting a new series: The Lunch Hour - in which I'll post all the recipes from things I've made at work in the office. If you only have a half hour, just prepare some of the batches at home and bake at work. You'll find it amazing.

For the first installment I'll add what I made at work today, which coincidentally does not include baking at all. To gear up for the holidays I thought I'd create a few chocolates for Jed. Today's choice: Chocolate covered coconut balls (like the chocolate bars called Mounds)
Ingredients:
1 stick (1/2 cup) butter - softened
1 tsp vanilla
1 cup confectioner's sugar
3 cups sweetened coconut
1 bag semi-sweet chocolates (Ghirardelli's)
In a large bowl mix the butter, vanilla, sugar, and coconut. Roll out little balls onto parchment paper. Once all the balls are done let cool in the fridge for about 10 minutes. Melt your chocolate in a bowl (it took about 1 1/2 min for about 1 1/2 cup of chocolate chips - the chips don't look melted but they will once you start stirring with a fork). Drop the balls in and place them back on the parchment paper. I ended up with close to 50 chocolates from this recipe. Place back into the fridge for 5 minutes to help the chocolate harden.
Try experimenting with coconut types and with chocolate types. I made the batter and balls, then ate my lunch, melted the chocolate and dipped them , and finished off by washing my dishes while the chocolates cooled. And just like that you can make your co-workers hate you for making their run time obsolete. Enjoy!!

Garlic
We've recently planted our garlic for the year. Last year we had Spanish Roja and Purple Glazer. Both turned out amazing so we thought we'd add to our varieties this year so that we can keep a large selection of garlic seed stock. This year we have: Spanish Roja, Purple Glazer, Late Pink, Russian Red, German Red, Purple Italian (All we need is a Japanese type to have an Axis Garlic group), and Bogatyr. We have French Red Shallots as well and we'll be experimenting with different types of onions. So far, we planted at least 100 cloves of each garlic, which will (with luck) produce 700+ heads of garlic. The ratio that is given is that 1lb of garlic can produce 10 lbs of garlic. If we're lucky, we can end up with 70 lbs of garlic. Jed says it's a good start.

Which brings me to my next part of garlic. When I was asked what I did for the weekend I told people about planting garlic, at which point every single person I met mentioned that they did not know that there were different types of garlic. Yes, yes there are many different types of garlic. Many wonderful, exotic tasting garlics. Some that can set your mouth on fire and others that will provide a subtle taste to your food. I'm including some pages that provide garlic (in particular heirloom garlic) for you all to drool over and enjoy. If you get a chance this year, try garlic. It is one of the easiest crops to grow although it does require a bit of time in the ground.
Sites for garlic:
http://www.groworganic.com/seasonal-items/seed-garlic.html
http://www.landrethseeds.com/catalog/index.php?cPath=29_969
You can also try your local Feed/Tractor store to see if they carry any.
I once heard an adage of planting on the shortest day and harvesting on the longest day, don't follow it. Garlic needs the dark days to encourage bulb growth. I had really good turn out planting Halloween and harvesting in May. The end of October is usually when we get the first frost so that works. Pay attention to your climate to determine when it would be best to grow yours. Good Luck and enjoy!!
Carrot cake/bread
As many of you know, I greatly dislike the taste of carrot, especially cooked carrot. Except, that is, when it is in cake or bread form. In that case I love tons of carrot because I cannot stand carrot bread with a measly 1/4 cup of carrots. Here is a recipe I've developed for carrot bread that turns out moist and nummy. Play around with the ingredients to make your perfect carrot bread.
Ingredients:
3 cups shredded carrots
3/4 cup butter
1/2 cup honey
2 eggs
2 tsp cinnamon powder
1/2 tsp ground ginger
1/4 tsp ground cloves
1 1/2 tsp baking powder
1/2 tsp baking soda
1 1/2 cup flour
Preheat oven at 350 degrees F.
Mix ingredients in a large bowl in order. Scoop into a greased bread or cake pan.
For a standard bread pan it is about 30-40 minutes or until done. Stick a sharp knife/skewer in the center, once it comes out clean it is done. Let it sit until cool.
I would have taken a picture but it has a tendency to go very quickly. Enjoy!!
Sunday, December 9, 2012
Sunday, November 11, 2012
Our first hard frost of the year
This year our first hard frost came in a bit late. Our frost came in on November 9th, this Friday. It killed off all our annual plants so we'll be tossing those green bits to Cow and the Sheep. We'll also put in the garlic and see about what other items we might want to play with.
A lull in the bacon
Today we were able to slaughter the last of our piggies. Ivan keeps
exploring his surroundings but is not yet aware that he should not be
near big omnivores that can eat him, so we figured the best thing to do
would be to process our piggies while we work on our gardening
infrastructure. This will allow us to move piggies easier in the future
and keep the geese and ducks away from our young trees and make for a
more pleasant entertaining areas.
We've noticed that with each slaughter it keeps getting easier and easier, but today was insane. We were able to process everything before 8pm and everything clean by 9pm. The curing meats are ready for the brine, the bacon are in bags curing and ready for next weekend to be smoked, the rest of the meat is packaged and in the freezer. The extra help with a means of lifting the piggy and having a large freezer really helped out. I think everything just seemed to flow smoother today.
It was nice to have hearty chili (Digger heart) on the wood burning stove during the day so that we could take a break when it was needed. In the future we'll advertise food earlier so that people can eat when they need. I think the second table was very helpful, but we needed to have the area set up earlier and with more access to piggies. I think an extra sink would be really nice so that we can have two points of meat to help the baggers not have a lull. For the most part I think today worked really well. I think another point that really worked in our favor was that our piggy was not too big. I think moving towards a smaller heritage breed and slaughtering them earlier will help us out a lot more.
The odd thing with Squeaks was that she was not fatty at all. We ended up with tons of fat off of Oreo and Digger, as well as Macaroon, but Squeaks was just lean and beautifully textured. I'm not sure what the change was or if it was just that we didn't put it tons of food for her to wallow in. She ate whenever she was hungry, but not to the point of wasting food. We'll see how our next hogs go.
Wednesday, October 24, 2012
Winter is on the way
Last night we received our first frost. The van was covered in ice and Jed had to wait a bit before we could drive him to work, but the leaves on the grapes and all the three leaf plantain around the tomatoes kept them from freezing up last night. The pumpkins are also fine so we'll see how long they last before the frost just gets to them.
What does this mean? That we will be paying closer attention to the weather and that we are able to plant our winter crops. =) Until now most of the leafy greens, peas, and brassicas would just kind of die and tell us to jog on. The heat does not let up until late in the year so we have to wait until the weather agrees with them. I keep reading about English gardens that grow brassicas year round.. all I can say is "You utter, utter bastards!" same goes for people who get regular rain and in good quantities (I'm looking at you people from Nevada City right now.)
Also, to add to the awesomeness of winter we were able to turn on the wood burning stove yesterday so that Ivan can learn why it is not smart to go near it, and why he is a jerk when he tries to play with the ashes after I told him not to. This also means that it is finally pie time!! We've been making pumpkin pie and will be adding more to that list. We've also started making pumpkin pasties and will enjoy some pumpkin muffins tomorrow with my little man. Happy baking everyone!
There is food and there is home food
I've come to realize just how awe inspiring our lifestyle has become. Jed joked last night when I told him we were eating lamb (not lamb again!) and I added a little bit of left over beef just to get it out of the freezer. What I noticed is that the beef turned into little rubber cubes that would not soften no matter how much I simmered or tenderized, the flavor was atrocious, and that my tummy let me know that I had eaten something that it did not recognize as food. How creepy is that? I stop eating beef for ... well a year now, and suddenly I realize that my body can tell if I'm eating home food or not. I mean, yes, I can tell with flavor and texture, but to know in a cellular level is a bit vexing. How is it that people are getting away with creating non-food for distribution at all major stores?

Ok, off my soap box. What I was really trying to write about is the odd nature of our lamb. I noticed that our lamb cooks faster, is more tender, and extremely flavorful. I don't know if others have noticed this same thing with their home meat. Our chicken, pork, and goat are the same way. Our meals are now dictated by the other ingredients (peas, beans, hard veg) as to how long we have to cook them. The meat is just added as a condiment to help flavor and enhance the meal. Something that was brought to my attention as I read up a bit on Thomas Jefferson and his enthusiasm for gardening and exotic veg. I think I prefer having the veg and starch be the main point of the meal with the meat enhancing the richness of the meal. This also includes stocks, which we have used this season to a much greater extent. Our rices are that much richer when cooked with home stocks and soups made with stock have a tendency to make us a bit comatose. Lard adds a creamy texture and flakiness to pastries that is to die for.
We do hope to be able to grow other oils in the future (peanut, sunflower, and olive) so that we can add additional flavor options to our food. And as soon as we throw Squeaks her retirement party we should have room to build the permanent fencing structure to keep the ducks, geese, and pigs out of our main crop production area. The work is never done, but it is very worth it just to get a bite.
Saturday, October 13, 2012
Fall

It's finally starting to feel like fall, I was even able to smell some woodsmoke the other morning which made me want to curl up inside and eat some warm soup.
I greatly enjoy Fall because all the other seasons seem so hectic. Winter I'm prepping all the tools, making sure that the animals have adequate coverage, pruning the trees and vines, fertilizing, clearing up the plants, and making sure nothing drowns if there is a lot of flooding. Spring consists of harvesting winter plants, baking, starting projects, working with the baby explosions (baby chicks, ducks, geese, turkeys, lambs, goats, and now calf), starting to process the dairy products, checking on garlics and aliums, and planting new plants. Summer is crazy harvest time as well as food processing time even though all you really want to do in the heat is tell it all to jog on. And when you get to Fall, you just want to relax a bit, maybe sit back and enjoy a warm cup of tea while wondering about what awesomeness you will be playing with next year. I guess you can call this my dreaming time. I get to image the construction of new infrastructure. I greatly look forward to the slaughtering and processing of the last of the nomnom animals. It's just mellow. It's a time to pick up a new book and read. A time to snuggle up in a blanket or make a new blanket. You can work on more indoor projects but also have the sunlight and weather to leisurely go about the garden and plant new things or weed and clear. I look a the last of my summer fruit and veg and invite it into the house to join us for a meal. I'm also looking at the pumpkins and I can imagine what the pies are going to taste like. What the house will smell like with pumpkin seeds roasting. I also get to wonder just how all this will change with Ivan running around the house.
For those of you who have been going full speed the rest of the year - cheers! enjoy some tea and a book and if any of you are in the area and just happen to stop on by, then we can see about making some pies and enjoying them while talking about plants and food. Cheers!
Sunday, October 7, 2012
Grain Mills

Last Xmas I was able to buy Rosie a Country Living Grain Mill. and we have been using it off and on for a little less than a year now and I wanted to let our readers know what I thought of it.
This mill is amazing.
Most of the mills I looked into stated right up front that you would probably have to run your grain threw them more than once to get a fine flour. The County Living people claimed that one pass was all you would need with their mill, and they where right. We have been grinding hard wheat, buckwheat, and corn almost every day for the last few weeks and this mill has never given us any problems. Every batch of flour has been very fine and surprisingly consistent.
There are a few issues with the mill that I would like to see done differently but the usefulness of the mill more than make up for them. One Issue I have is that the mill body is made from aluminum, this has not been an issue but I would rather see it made from steel. Another correctable issue is that the flywheel is a little small and grinding hard wheat without the "power arm" can be a little tough but not undoable. Lastly the price of this mill is a little high, the next cheapest mills are about 1/2 the price of the Country Living Mill although the next mill in quality above the Country Living Mill is about 2-3 times the price.
If you are thinking of adding a grain mill to your own homestead this is the mill you want to get. The flavor and texture of fresh ground flour or meal is as far beyond store bought as our fresh farm eggs are above store eggs. Some things I would suggest if you are going to invest in this mill; get the power arm, it will be worth it in the long run. After all if it is a pain in the butt to use the mill you are less likely to use it and then why even get one? Also get the corn and bean auger, this part can be used when you want to grind something bigger than a wheat berry, you could "probably" make do without it and just try and grind corn meal with the standard auger but it would be a pain and may not work very well. Now this mill is not cheap, it will run in the $400 range but it is of the highest quality and will last you the rest of your life (you will have to replace the grinding plates every so often). There are some cheaper mills that will also do a fair job but you will have to run your flour threw them up to 4-6 times to get a good consistent flour. It takes about 15 min to make a couple of cups of flour in our mill, if you had to run it threw even 4 times then you area looking at an hour of work rather than 15 min, and that is a huge difference. The Country Living Grain Mill is fast enough that I will grind flour for the breakfast scones while I am waiting for my coffee to finish brewing.
Grinding our own flour has been a surprisingly satisfying experiment and next time you are able to join us for a meal that includes some sort of bread it will be from flour that was ground be hand in our kitchen. And that act of grinding our own flour is as strangely liberating as the flour is strangely better tasting than any flour I have ever used.
Saturday, September 29, 2012
Fall is on the way at the homestead, or so I hear
The official first day of fall has already passed, but you would not know it by our 90+ deg. temps here on the Homestead. Things here are still running hot and dry with little Autumn in site. The beans, corn, squash and watermelon still think is it the height of summer and by all accounts this winter will be a mild and dry one. But there are a few signs that the season is changing;
The other morning while I was at work, I was washing my ambulance before I went off duty and I noticed for the first time this fall that the sun was not quite up yet. And that simple fact threw my mind into the Autumn, threw me back to a pot of stew simmering on the wood burning stove, sweaters in the chill morning as we head out to do the morning chores, back to coats and cold, back to wind and rain, ice and freezing temps.
One of the things that we have come to enjoy here is the change of seasons, by the end of summer Rosie and I are ready for the cold and the wet to start. By the end of last winter I was thinking about sandals and t-shirts and looking forward to the heat. Since each season brings us such differing trials and tribulations in this life style we come to welcome the change to something new. Prior to the homestead the only real change in season I noted was the start of fire season and the hope I could get some extra work in on the fire line, now each of the four seasons beings its own tasks that are unique to that few months of time.
So here is to fall, raise a glass and hope for a rainy season.
Sunday, September 16, 2012
Left out

OK the image has nothing to do with this post, I just thought it was funny.
Well we just completed another slaughter day, roughly 25 roosters and one drake met their end. We had a number of people who where able to attend and a few who wanted to but where unable to make it out. There where some people who I thought who would be interested but we never heard from them and that got me thinking.
Some people (and it seems like a lot when I start to count) who hear about what Rosie and I are attempting at our homestead and seem like they want to come by and be a part of our project days but we rarely hear from them or see them. Often times this is because people have lives, like we used to before this whole homestead thing, and are unable to make it out due to kids or work or school or whatever. But some times people "did not know you where doing a slaughter party on that day" or the like. We really don't mean to leave any one out and we really do enjoy it when people come over to be part of this grand experiment that is Jed and Rosie's Homestead, "Good Enough Farm" is always better with more people on hand to enjoy it. But some times people feel left out because we did not get a hold of them via phone or personal email. When we invite people over we do so via online social networking (mostly facebook) and we are able to get out the work quite easily and make updates at the last moment. Yes I know some people won't or can't use facebook or other online networking sites, but frankly if you refuse to use them you WILL miss out on information passed over them. When we send out announcements for a work day or a slaughter party we are sending out a notification to over 100 people, making 100 individual phone calls or emails is simple not possible for us in any realistic way. And we don't mean to leave anyone out but people do slip threw the cracks when we are trying to talk at that many people at once.
So if you feel slighted that we did not tell you about an event at the homestead, rest assured that if you where over looked it was accidental and not in any way intentional. We value all our friends and as such you are all welcome over here to join in this community, many hands make light work and more fun.
Please look us up on Facebook if you want to have the hands on experience at Jed and Rosie's Homestead.
Sunday, August 19, 2012
Extra
From time to time people will ask "If you ever have any extra ______ I would be happy to take some". The problem with that is a difference in mind set, we never have any "extra" of anything at our farm. Everything has a use and a value, nothing we grow or raise will go to waste and nothing is disposed of without cost. Do you ever have any "extra" money in your bank account that you would give to someone just because they asked? I did not think so. Now don't get me wrong, Rosie and I are more than happy to be generous with what we have and share with the people who help us sow and reap, raise and slaughter. Even the people who just come by to hang out and give us some people time are doing us a great service and we like to be able to share with them what we have. But even when we are up to our eyeballs in squash or knee deep in milk none of it is ever "extra". Even the stuff that gets fuzzy will go to the pigs and with their flesh, back to us. Every scrap of food that we feed to the chickens has a dollar amount attached to it somewhere, what we produce is used in place of bags of feed from farm supply and the monetary conversion is easy to make.
Now I am not talking about anyone specifically, but more a re-occurring attitude I run into that some how the food we produce on our farm is "free", I guess if you don't buy is from a store it is not worth anything. Rosie and I probably spend more on our food than if we where to buy everything at the local store but the quality of the food we have here is far beyond what we could ever afford to buy on our own. I once had a very high prestige chef, who's restaurant raises its own herd of pigs for their exclusive use, tell me that the pork we are producing on our farm is the finest he has ever seen or tasted. That's right, our piggies are better tasting than the $200 loin cuts served at a shop so exclusive that not only would I never be able to get in but even if I did I would never be able to afford more than the after dinner mint. Not exactly the quality of food you get from Safeway, but the quality of food we raise here on our farm. So next time some one gives you a tomato from their garden box or a bottle of their homebrew or a loaf of hand made bread remember that you are receiving not just a food item but a work of art so exclusive that it is simply unavailable outside of the most rarefied circles.
Now I am not talking about anyone specifically, but more a re-occurring attitude I run into that some how the food we produce on our farm is "free", I guess if you don't buy is from a store it is not worth anything. Rosie and I probably spend more on our food than if we where to buy everything at the local store but the quality of the food we have here is far beyond what we could ever afford to buy on our own. I once had a very high prestige chef, who's restaurant raises its own herd of pigs for their exclusive use, tell me that the pork we are producing on our farm is the finest he has ever seen or tasted. That's right, our piggies are better tasting than the $200 loin cuts served at a shop so exclusive that not only would I never be able to get in but even if I did I would never be able to afford more than the after dinner mint. Not exactly the quality of food you get from Safeway, but the quality of food we raise here on our farm. So next time some one gives you a tomato from their garden box or a bottle of their homebrew or a loaf of hand made bread remember that you are receiving not just a food item but a work of art so exclusive that it is simply unavailable outside of the most rarefied circles.
Thursday, August 9, 2012
The magic power of elderberries
Have you ever tried a raw elderberry? They are tart and earthy and not really very good. Ivan eats them raw, but then again he likes sticking a toothbrush into my strawberry bed soil and then sticking it in his mouth, so that really isn't a recommendation. The awesome thing about elderberries is that they magically transform into awesomeness as soon as you cook them. How is that for a neat survival trait in a plant? Doing research for our Saxon village I found that elderberries grew and were used for food and medicine during that time period so I figured I might as well put a few into the yard. I was able to pick one up at the Tree Man in Paso and another through a catalog. Two years into it and the bushes are growing very well. The original bush is over 8 feet tall and has given us tons of fruit this year.
When the berries were starting to ripen we would taste them periodically and figured that they just tasted like bum. Near the end of July the berries were getting pretty full and I even emailed one of our friends in the Nevada City area to see what he did with the elderberries that grew wild on his property to see if we could get some ideas of what to do. He had the same experience with the berries and had made a cordial with them. My interest was peaked again one night when Jed was watching The Hatfields and the McCoys and one of the ladies said, "Mmmm, elderberry jam. Ain't nothing sweeter," with this look of complete ignorance. My though, of course, was have you tried elderberries?
I started doing more research on them because they couldn't just be that bad. I mean, they are mentioned in tons of medieval texts and self sufficient books from Britian. I started finding references to the taste change that happens when you cook them and I wanted to try it. One morning while Jed and I were getting read y to make breakfast I offered to bring in some elderberries to eat with the scones since we were out of raisins. I suggested we double the honey since they had always tasted very tart before. The outcome was something amazing. Slightly sweet with mild mulberry like taste and a slight tartness to it. In short, we were hooked. But no matter how often we eat scones and pancakes, I could never make enough of them to keep up with the supply of berries. I decided to try making jam. I found some references to soaking the berries in honey for a couple of hours before making them into jam so I thought I'd try that.
Yesterday, Ivan and I picked a bucket full of berries and I would take some berries off the stem whenever I would pass them. After Ivan fell asleep for the night I then stayed up to clean the rest. I only got about 6 cups cleaned and ready to use but I was too tired and it was past midnight. I added about 2.5 cups of honey to them and put them in the fridge. One other thing that the pages I read said was to 'wait until the juice is released," which I had no clue what this might reference. I found out in the morning when I saw the bowl with about 4 cups of liquid and 2 cups of floating berries. Apparently, the berries are primarily juice and it is released when mixed with a sweetener or cooked. During Ivan's morning nap I was able to clean another 4 cups of berries and I ended up just giving the last two cups to the chickens for them to snack on. I simmered the berries for a bit while I was with Ivan. After Marky came home I had enough time to set the water bath and the juice to boil so that I could can the berries. I added the pectin and cooked it down a little bit more. As soon as the berries coated the spoon I turned of the simmering jam and packed them in cans. I put them back in a water bath for 15 minutes although some of the sources said 5 minutes would do.
I tried the syrup before I made it into jam and it was amazing. It tasted just like the blue tootsie pop. Exactly, including the slightly chocolaty aftertaste. It was amazing!! I then found additional sources for elderberry pie, crumble, ice cream, and tons of other recipes. I'm going to have to try them all out and see if we can save the jam for the winter. Although if the jam is as tasty as the strawberry jam we made earlier this year then it won't last until the end of the month. I'm glad the bush is still producing berries because now I'm looking forward to cooking a lot more with them. I'm also thinking about adding a few more in the Saxon area so that we can have them in the back and so that they can provide shade for other berries.
When the berries were starting to ripen we would taste them periodically and figured that they just tasted like bum. Near the end of July the berries were getting pretty full and I even emailed one of our friends in the Nevada City area to see what he did with the elderberries that grew wild on his property to see if we could get some ideas of what to do. He had the same experience with the berries and had made a cordial with them. My interest was peaked again one night when Jed was watching The Hatfields and the McCoys and one of the ladies said, "Mmmm, elderberry jam. Ain't nothing sweeter," with this look of complete ignorance. My though, of course, was have you tried elderberries?
I started doing more research on them because they couldn't just be that bad. I mean, they are mentioned in tons of medieval texts and self sufficient books from Britian. I started finding references to the taste change that happens when you cook them and I wanted to try it. One morning while Jed and I were getting read
 y to make breakfast I offered to bring in some elderberries to eat with the scones since we were out of raisins. I suggested we double the honey since they had always tasted very tart before. The outcome was something amazing. Slightly sweet with mild mulberry like taste and a slight tartness to it. In short, we were hooked. But no matter how often we eat scones and pancakes, I could never make enough of them to keep up with the supply of berries. I decided to try making jam. I found some references to soaking the berries in honey for a couple of hours before making them into jam so I thought I'd try that.
Yesterday, Ivan and I picked a bucket full of berries and I would take some berries off the stem whenever I would pass them. After Ivan fell asleep for the night I then stayed up to clean the rest. I only got about 6 cups cleaned and ready to use but I was too tired and it was past midnight. I added about 2.5 cups of honey to them and put them in the fridge. One other thing that the pages I read said was to 'wait until the juice is released," which I had no clue what this might reference. I found out in the morning when I saw the bowl with about 4 cups of liquid and 2 cups of floating berries. Apparently, the berries are primarily juice and it is released when mixed with a sweetener or cooked. During Ivan's morning nap I was able to clean another 4 cups of berries and I ended up just giving the last two cups to the chickens for them to snack on. I simmered the berries for a bit while I was with Ivan. After Marky came home I had enough time to set the water bath and the juice to boil so that I could can the berries. I added the pectin and cooked it down a little bit more. As soon as the berries coated the spoon I turned of the simmering jam and packed them in cans. I put them back in a water bath for 15 minutes although some of the sources said 5 minutes would do.

I tried the syrup before I made it into jam and it was amazing. It tasted just like the blue tootsie pop. Exactly, including the slightly chocolaty aftertaste. It was amazing!! I then found additional sources for elderberry pie, crumble, ice cream, and tons of other recipes. I'm going to have to try them all out and see if we can save the jam for the winter. Although if the jam is as tasty as the strawberry jam we made earlier this year then it won't last until the end of the month. I'm glad the bush is still producing berries because now I'm looking forward to cooking a lot more with them. I'm also thinking about adding a few more in the Saxon area so that we can have them in the back and so that they can provide shade for other berries.
Wednesday, August 8, 2012


Mugwort

Many moons ago I had a lovely mugwort plant that I had in the bigger Morro bay apartment. That little plant ended up getting torn out by the landlord who wanted to landscape my garden. Since then I have had a very difficult time trying to find mugwort again so that I could make my night time teas. Well, after visiting Windrose Farm I was talking about looking for mugwort with Lisa and she mentioned that they were growing some to propagate. I had to ask to see if I could buy one once they went on sale and Lisa thought that might do. Lisa asked Farmer Barbara if she could have some cuttings for me since I was looking for mugwort and that lovely lady gave Lisa a whole plant in a pot to give to me. It almost made me cry because I love it when people are so nice and love their plants so much that they share them with others. I want to grow up to be alike Farmber Bill and Barbara they are my new heroes. I love my little mugwort.
2012 Fruit
Just for a reminder to myself and to see how this will compare with next year.
June - Boysenberries throughout the month - fair crop
July - Braeburn apples ready to pick with strawberries and elderberries coming in at the end of the month
August - Grapes matured as well as the main crop of elderberries - strawberries still producing
Note - For next year, pay attention to southern batch of berries and smaller elderberry bush, as well as blueberries, gooseberries, and currants.
Weather for 2012 - low rainfall <15" of rain, temp in 100s since April, some random humid/muggy days with extreme lows in the winter (dipping in the low teens)
Monday, August 6, 2012
Scones
Scones have become a normal breakfast around the homestead, they are easy to make, taste good, and are a quick breakfast. These are raisin scones but we have also made elderberry, candied orange peel, plain, apple and a few others, all are very good. Here is a recipe that I got from an English grandmother. We use a baking stone for a cookie sheet and get very good results.
Raisin Scones
2-1/2 cups flour
3 tablespoons white sugar (you can omit this, Rosie and I use honey)
1-1/2 tsp. baking powder
1/2 tsp. salt
1/2 cup butter
1/2 cup raisins
1 egg, lightly beaten
3/4 cup milk
Preheat oven to 425 degrees. In a large bowl, mix the flour, sugar, baking powder and salt. Cut in the butter until the mixture looks like coarse crumbs. Blend in the raisins, then mix in the egg and enough milk to form soft dough. Turn the dough onto a floured surface and pat gently into a 10-inch circle (about 3/4 of an inch thick). Cut into wedges. Separate the wedges and place them onto a lightly floured baking sheet. Bake at 425 degrees for 16-18 minutes or until golden brown. Note: Try blueberries, cranberries and orange peel, chocolate chips, or other favorite addition instead of raisins.
Friday, August 3, 2012
The Breakfast Club
Sometimes I find it very difficult living in a house where everyone wants to wake up after 10am. There is something magical and comforting waking up to watch the sky lighten and the moon hide behind the clouds or sink down behind the trees. I think that coffee commercials build up the hype about drinking coffee in the morning before starting your day. Actually those commercials make me want to throw rocks at the fauxfarmers and the roosters on them. Jed has to have his coffee or tea in the morning, but if I was to do that I would not get started until way later than I needed to start. Sometimes I wish I could drink something hot, but a prepared meal is really what happens after your morning chores. For example the other morning I got to chase a pack of coyotes at 3:30am (with Zuzu) then finish cleaning up so that I can process more milk. I started more laundry and picked up after the little man. After that was watering of the plants in the front with picking of basil before the bees could get to the flowers. Mint and soapwort were picked for another batch of soap and I was able to pick up two dropped Braeburns and a couple of dropped almonds as my breakfast. I ate these while weeding and I was able to finish my morning chores in time for Ivan to wake up around 7am. All in time to get everything ready to go milk Cow and start the morning batch of milk processing.
Don't get me wrong, I usually get to come back inside and make scones or pancakes for the little man before we go milk Cow, but that is also on the run. I think I just prefer that quiet time before everything else wakes up and when it is just me and my plants getting to know each other. When I get to find the newest pumpkin growing or the fat strawberry that Ivan will eat later on. Or inspecting the poor grapes that Ivan has ravished (Ivan the Grapist?) the previous day or the apples to see what I can do to help the tree for next year. It seems a bit awesome to me to be out there even when it's just me and the fading light of the stars as the sun begins to peak. I just seems magical to me. Or maybe that's just the mommy in me getting a break and so everything seems magical.. or maybe it's just the lack of sleep. But in any case, I say if you get a chance go out into your garden in the morning hours before the sun begins to peak and take a look at your plants. The sights and smells will be completely different than what you see during the day. Just as in the evening, that transitional period of time makes the garden feel different see if you can sneak a chance in the morning to experience your plants as they begin to wake up as well.
Don't get me wrong, I usually get to come back inside and make scones or pancakes for the little man before we go milk Cow, but that is also on the run. I think I just prefer that quiet time before everything else wakes up and when it is just me and my plants getting to know each other. When I get to find the newest pumpkin growing or the fat strawberry that Ivan will eat later on. Or inspecting the poor grapes that Ivan has ravished (Ivan the Grapist?) the previous day or the apples to see what I can do to help the tree for next year. It seems a bit awesome to me to be out there even when it's just me and the fading light of the stars as the sun begins to peak. I just seems magical to me. Or maybe that's just the mommy in me getting a break and so everything seems magical.. or maybe it's just the lack of sleep. But in any case, I say if you get a chance go out into your garden in the morning hours before the sun begins to peak and take a look at your plants. The sights and smells will be completely different than what you see during the day. Just as in the evening, that transitional period of time makes the garden feel different see if you can sneak a chance in the morning to experience your plants as they begin to wake up as well.
Thursday, July 26, 2012
Peppermint soap
I picked up a couple of lovely soapwort plants from Fat Cat Farm a few years ago. The chickens ate some of the plants but I managed to keep one alive in the front. This year I ended up with my soapwort growing into the path so I decided to make liquid soap for the house. Looking around in the front I also noticed that I have more mint than I can use all winter for tea so I decided to pick some of the mint to scent my soap.
Looking around I found a couple of guidelines for using fresh soapwort leaves and stems as opposed to using the root in the winter time. In short the ratio was 2 cups of soapwort to 4 cups of water. Bring this to a boil and then simmer for 15 minutes. I simmered the soapwort and the mint together so that it could get some of the mint oils as well. I then let the soap cool completely. After this I strained the soap into my old soap bottle and added a couple of sprigs of mint for extra scent and the batch was ready to use. I used the soapwort pieces to scrub dishes until it was all gone.
The result was a lovely peppermint scented soap that I will definitely make again. Next on my list of things to try - liquid soap made from soapnuts.
Monday, July 16, 2012
Ivan is a helper


I think in this case images speak for themselves. Ivan is a helper, although sometimes you dearly wish he wasn't so into the farming lifestyle.
Sunday, July 15, 2012
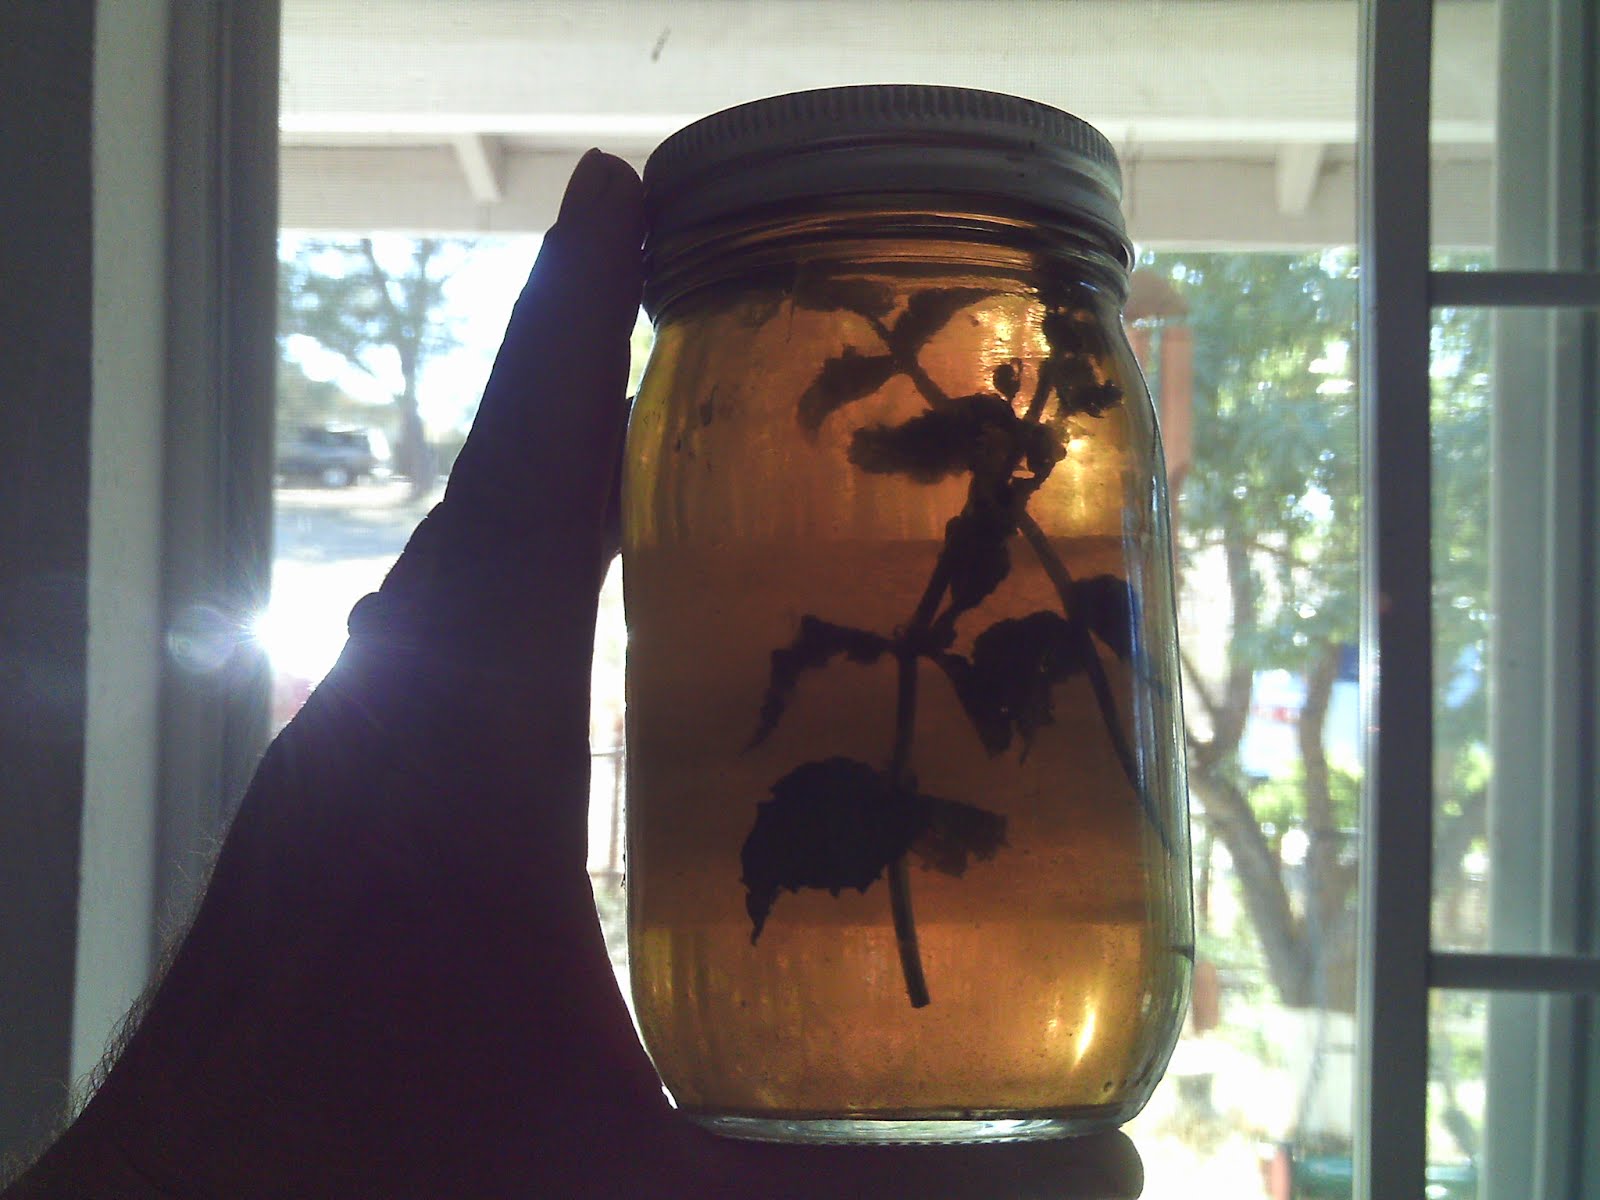
Vanilla - Making your own
You can find many different recipes online so I'll give you a quick note on how I made mine and some few suggestions.
How to make homemade vanilla extract:
1. Cut vanilla beans down the middle but leave a little section still connected. Use 3 beans per cup of vodka. I used a quart jar so I used 12 beans for 4 cups of vodka.

2. Place in clean jar.

3. Add vodka.

4. Close and shake. Shake periodically your first day and then again whenever you think about it.
5. You can start using your vanilla whenever it smells ready. (Mine were ready in 2 weeks)
Note: I would highly suggest you use good vodka (Grey Goose or something equally good or better). If you use something like borski then you'll end up with something that smells/tastes like store vanilla but that is of much lower quality than you can make.
How to make homemade vanilla extract:
1. Cut vanilla beans down the middle but leave a little section still connected. Use 3 beans per cup of vodka. I used a quart jar so I used 12 beans for 4 cups of vodka.

2. Place in clean jar.

3. Add vodka.

4. Close and shake. Shake periodically your first day and then again whenever you think about it.

5. You can start using your vanilla whenever it smells ready. (Mine were ready in 2 weeks)

Note: I would highly suggest you use good vodka (Grey Goose or something equally good or better). If you use something like borski then you'll end up with something that smells/tastes like store vanilla but that is of much lower quality than you can make.
I now pronounce the front - Herbalicious and Edible!


When we first moved in we noticed a boxwood at the corner of the fence that was not on our plan, but hey it provided shade for the cats so we let it stay. Well, it just kept bothering me; it did not provide anything edible, it was big and unruly, and it smelled bad. We were finally able to dig the boxwood out (with the help of a wonderful Holly) and put in a Pomegranate (Wonderful). Its a bit small at the moment, but it will grow into the corner and provide shade for the cats and allow grapes to weave through the fence. Yaay for another milestone! Also for the front - the chickens killed all the baby artichokes so we only had one artichoke this year. The asparagus are growing well and we plan to have a much bigger harvest next year. What I'm hoping to do is put in a few more bushes (maybe blueberry?) and add lavender and rosemary to the strip near the driveway since that area seems to be pretty rocky. I'm hoping to tame that strip a bit more next year so it won't just look like a strip of overgrown oats and wheat.

And because I drank a ton of homemade chai and feel like if I have all the energy in the world... here are a ton of pictures from the front.
Pictures include - the baby pomegranate in the corner (the fuzzy pic), almonds in the tree, our braeburn apples, amish pumpkins, and the three sisters +(amish pumpkin, wapsi valley corn, home beans, and some borage)
Saturday, July 7, 2012
Keeping up with the blog


Summer tends to be extremely busy with the garden, so we don't always have time to sit down and write down things we would like to post about. To try to catch up, let me see if I can briefly describe what we've been up to.
Front yard is all planted and we're seeing what works best for next year. We continue to do crop rotation in the front to maximize our return in produce and to keep bugs and disease to a minimum. We also incorporate a ton of companion planting to see if that will help our yields. We have two chickens who make it out to the front in a fairly regular basis. Although they have ravaged one of my strawberry beds (and ate all the potatoes) they are keeping the slugs, snails, and rolly pollies down to a minimum, which is working well for me. The chickens are being trained to go up front, lay their eggs, eat some bugs, and then hurry on to the back yard. We'll see if this works long term. In the front we have, berries, grapes, apples, mint, lemon balm, strawberries, rosemary, sage, savory, comfrey, watermelon, cucumbers, pumpkins, melons, sunflowers, popcorn, corn, onions, potatoes, garlic, almonds, tomatoes, basil, peppers, and chives growing. We had a fabulous run on berries this year, with three of us going out and eating berries every single day in June and we were still able to make some berry scones and ice cream. I'll expand the berry section next year to double it's existing area as well as planting additional plants along another fence. Our goal is to have so many extra berries that we can actually make jam and maybe some berry mead.
Talking about mead - my italians flew off and in my despair I did not take the boxes down in a fairly timely manner... which only worked to my advantage since the boxes were then populated by a local wild swarm and they are working fairly hard to build up their numbers.
The backyard is thriving as well, but as it turns out this is a much longer post than I originally thought and I'm tired and need to repeat my day tomorrow.. Good night all!
In the pictures we have - Sungold tomatoes, buckwheat, squash, strawberries, and popcorn with a golden melon flower peeping through.
Sunday, June 10, 2012
No, my dryer is not broken... the sun is working just fine
For some reason whenever people see our clothesline at work they usually ask me if my dryer is broken. Nope, sun is working just fine. I've had a lot of people ask me this lately and for some reason is bothered me a bit. I love line drying my clothes. I love the smell, the feel, the look. The dryer is one of those things we use if Ivan needs diapers ASAP or if it's too rainy to dry. I bet if my neighbors line dried their clothing then they wouldn't have such high electricity bills or have to refill their propane so often.
Saturday, May 26, 2012
A Tale of Two Garlic
 We inadvertently demonstrated the effect of pressure treated boards on garlic. Last year Jed made three raised beds for me to play with so that the birds wouldn't get into them. Last season we cleared out the duck pond and moved all that "mud" into the two small raised beds (by small I mean 3x12ft) and then layered them with topsoil. These two beds we used to plant our garlic. This year we tried out a variety called Spanish Roja that the local farm supply stocked. Approximately 70 cloves went in to each bed in October. All were planted about an inch down into the soil and covered with about 3 inches of straw. Both were watered at the same time, weeded at the same time, and mulched at the same time. The only difference was that one bed was made using old boards, and the other was made using old pressure treated boards. I wish I could have taken a picture when the greens were growing to show the difference.
It was immediately obvious that the pressure treated bed was not doing well. Of the 70 cloves that we planted in each bed, all of them grew in the plain board bed while only 11 grew in the pressure treated bed. We planted another 70 cloves into the pressure treated bed hoping it was just a bad batch we put in there. Once again, most did not sprout and in total we had only 22 garlic grow.
Around the time that they were mature we placed the baby chicks in with the failed garlic bed and they, of course, ate and trampled all the greens. Not much of a loss as the garlic had technically finished growing.
 As the last of the greens in the good bed finished falling over I decided to harvest the garlic this weekend and since I was unable to take a picture of the greens to compare them I thought I'd show you a picture of the harvest for you to see the results. The first image is of the sad garlic in the failed bed when I first put the chicks into the bed. The second image shows the big braid of garlic from the good bed followed by a picture of the small heads of garlic from the good bed, and I did not picture the smaller heads that I put straight into our garlic drawer. The last picture is the entirety of the harvest from the pressure treated bed. (Ivan is helping)
The lesson learned from this experiment was that no matter how old the pressure treated board is that you are trying to use in your garden, it seems as though it will continue to leach out chemicals while it is in use. I know many people say that it is safe to use pressure treated boards as edging for your garden and that it won't affect your plants, but the garlic seem to tell us a different tale. I don't know whether to try planting legumes in the same beds to see if this effect is true for more than just one crop or to skip the trial as I'm playing with things that I and my family will consume. Knowledge is power, but formaldehyde is not something I want my food to play with when my family is involved.
And also, for companion planting - garlic and peas do not grow well together. The growth of the garlic is stunted. I did not notice a decrease in productivity in the peas.

Subscribe to:
Posts (Atom)